Let’s discuss why we need to export data in Outlook:
- Backup: Exporting data allows you to create a backup of your Outlook data, including emails, contacts, calendar entries, tasks, and more. This helps protect against data loss due to hardware failures, software errors, or accidental deletion.
- Migration: When switching to a new computer or email client, exporting data from Outlook allows you to transfer your emails, contacts, and other information to the new environment. This simplifies the transition and ensures you have access to your important data.
- Archiving: Exporting data allows you to create archives of old or infrequently accessed emails, freeing up space in your mailbox. Archived data can be saved to an external storage device or a separate file, making it easily accessible for reference purposes.
- Sharing: Exporting specific data from Outlook enables you to share it with others who may not have direct access to your mailbox. For example, you can export a specific folder containing relevant emails and share it with a colleague.
- Compliance: In some cases, organizations may need to comply with legal or regulatory requirements, such as retaining specific emails for a certain period. Exporting data allows you to store and manage this data separately to meet compliance obligations.
To export data in Outlook, you can follow these steps:
1 – Open Microsoft Outlook on your computer.
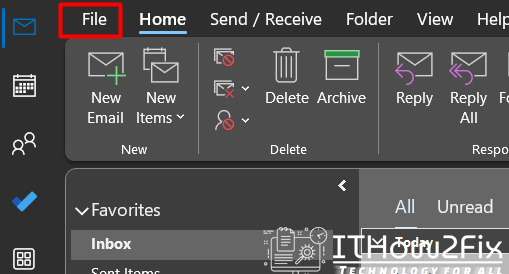
2 – Click on the File tab in the top left corner.
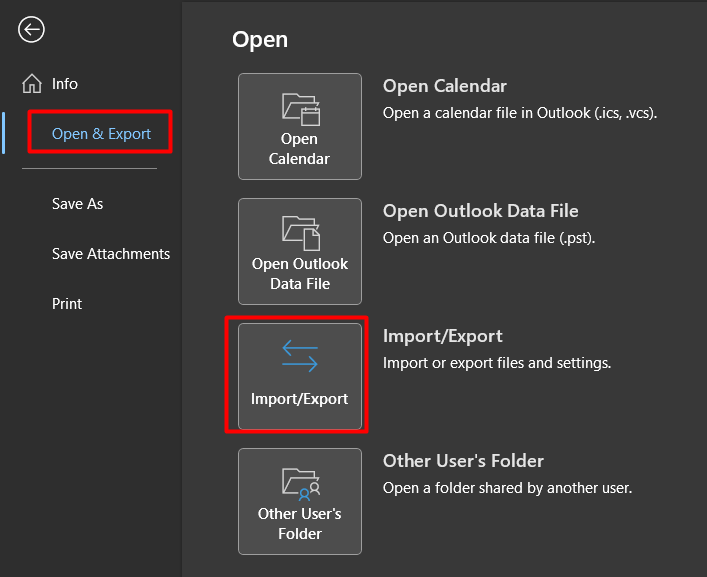
3 – From the menu, select Open & Export and then choose Import/Export.
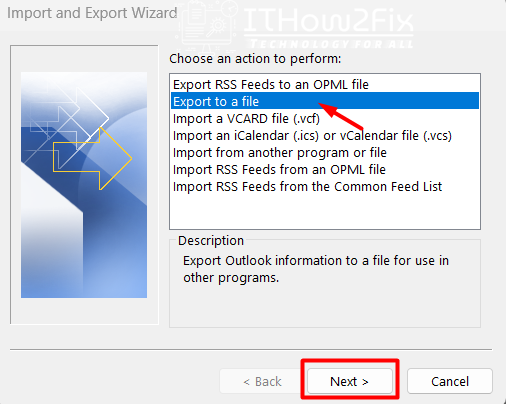
4 – In the Import and Export Wizard window, select Export to a file and click Next.
5 – Choose the file type you want to export Outlook Data File (.pst) and click Next.
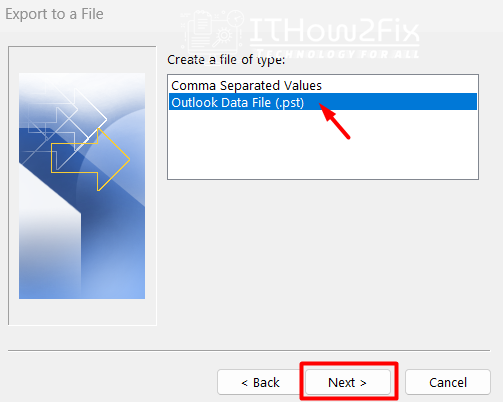
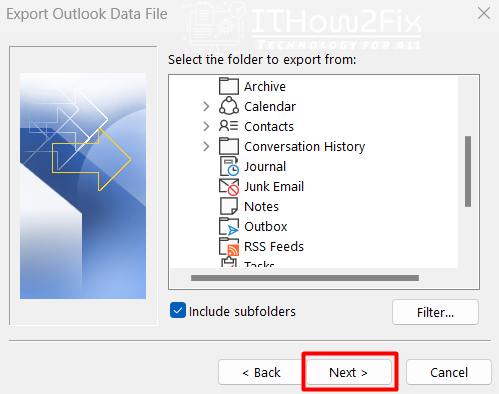
6 – Select the folder(s) or specific data you want to export. You can choose to export the entire mailbox, specific folders, or items based on certain criteria. Click Next when done.
7 – Choose a location to save the exported file and provide a file name. You can also specify additional options, such as replacing duplicates with exported items. Click Finish to start the export process.
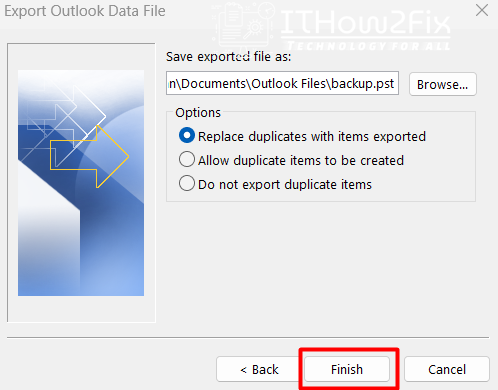
8 – Enter a password if you want to protect the exported file with a password. This step is optional. Outlook will start exporting the selected data to the specified file location. The time taken will depend on the size of the data being exported. Once the export process is complete, you will see a confirmation message. Click OK to finish.


