In Windows 11, a permission account refers to a user account that has been granted specific access rights or privileges to perform certain actions or access certain resources on a computer. These permissions control what a user can or cannot do within the operating system and its associated applications and services.
There are different types of permissions that can be assigned to user accounts in Windows 11, including:
– Administrator
An administrator account has full control over the system, including the ability to install software, modify system settings, and manage other user accounts. This account type has the highest level of permissions and is typically used by system administrators or power users.
– Standard User
A standard user account has more limited permissions compared to an administrator account. Standard users can perform regular tasks, access files and folders, and use most applications, but they do not have the ability to make system-wide changes or modify critical settings.
To change the permissions of an account in Windows 11, you can follow these steps:
1 – Click on the Start menu and select the Settings icon. In the Settings window, click on Accounts to access the user accounts settings.

2 – In the right, select Other Users

3 – Under the Other Users section, you will see a list of user accounts. Select the account for which you want to change permissions and Click on the Change account type button.

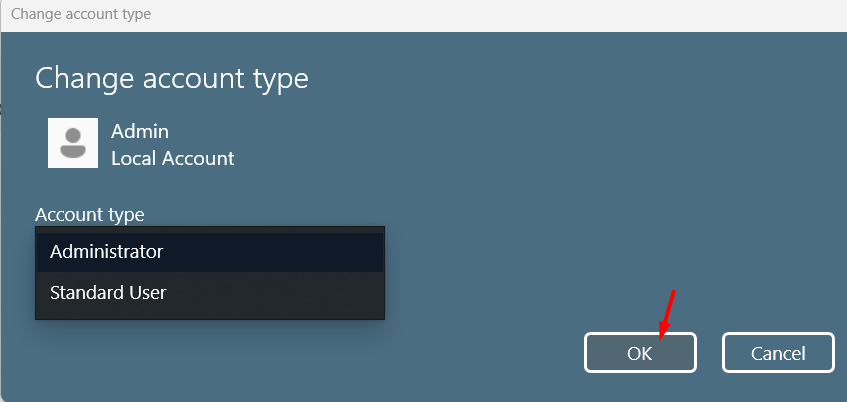
4 – In the pop-up window, you’ll have the option to choose between Administrator and Standard User account types. Select the desired account type. Click on the OK button to save the changes.

Please note that changing the account type may require administrative privileges. You may be prompted to provide the necessary credentials to make the changes.
It’s important to exercise caution when modifying account permissions, especially for administrator accounts, as changes to these settings can impact system security and functionality.


