In Windows 11, you can set the time for how long your lock screen stays active before your device goes to sleep or locks itself automatically. This feature allows you to customize the duration before your device enters a locked state, providing an added layer of security and privacy.
Here’s how you can set the time lock screen in Windows 11:
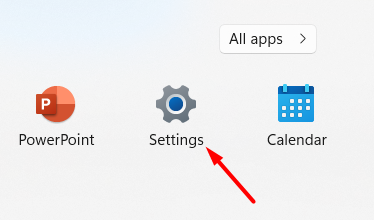
1 – Click on the Start button in the taskbar to open the Start menu. From the Start menu, click on the Settings icon, which resembles a gear.

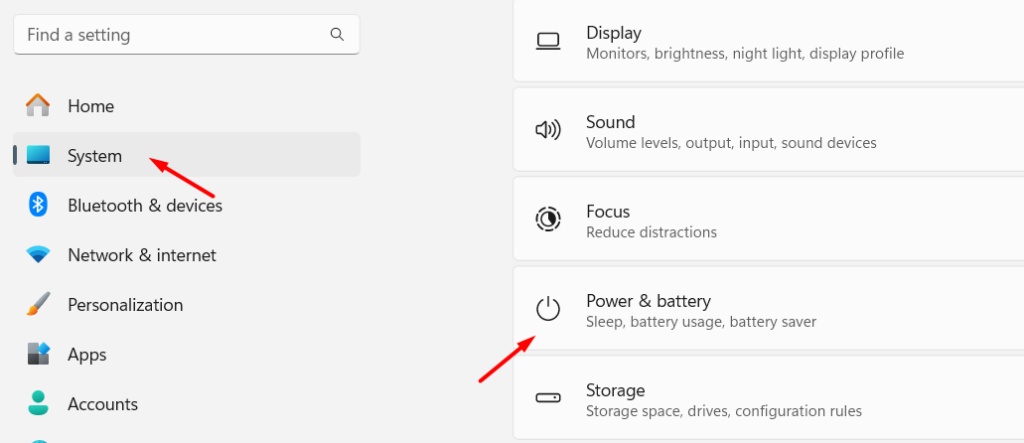
2 – In the Settings window, select the System category. Within the System settings, click on the Power & Sleep option located on the left-hand side.

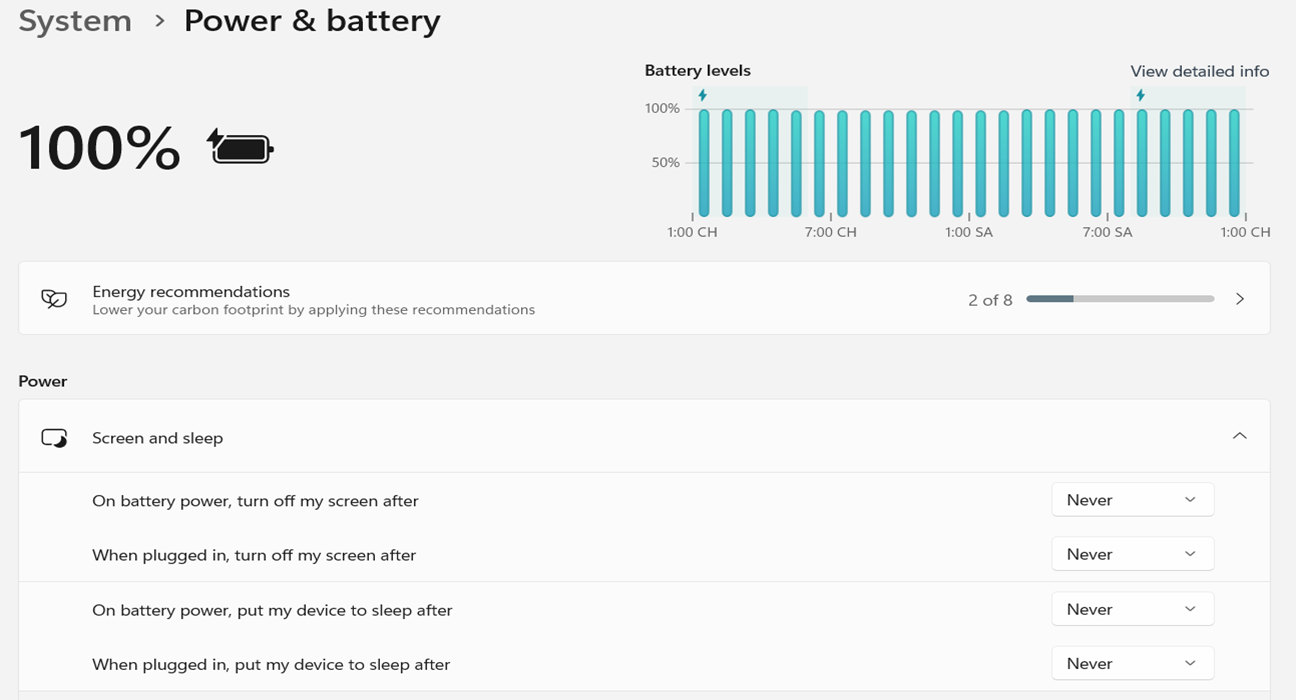
3 – On the Power & Sleep page, scroll down to the Screen and sleep section.
Under the Screen section, you will find the Screen timeout option. Click on the drop-down menu to see the available time options.

4 – Choose the desired duration for the lock screen timeout. You can select options like 1 minute, 5 minutes, 15 minutes, or customize it according to your preference. Once you have selected the desired lock screen timeout duration, you can close the Settings window.
By setting the time lock screen in Windows 11, you can ensure that your device automatically locks itself or goes to sleep after a specific period of inactivity. This helps protect your privacy and data by preventing unauthorized access when you are away from your device. It’s important to choose a lock screen timeout duration that balances convenience and security, based on your individual needs and preferences.


