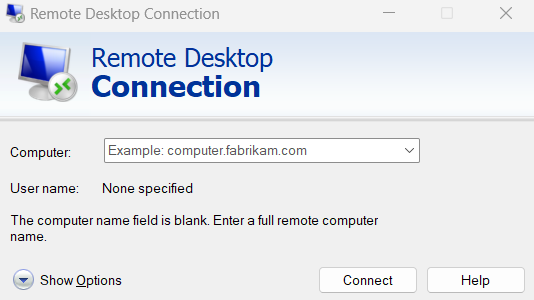
Remote Desktop Connection (RDC) is a technology developed by Microsoft that allows users to remotely access and control a computer or server from a different location. With Remote Desktop Connection, you can connect to a remote computer over a network or the internet as if you were physically present at that computer.
The primary purpose of Remote Desktop Connection is to enable users to access their workstations or servers from home, on the go, or from any other remote location. This technology is particularly beneficial for businesses and individuals who need to access their files, applications, or resources on a remote computer without physically being in front of it.

To establish a Remote Desktop Connection, the remote computer must be running a version of Windows that supports the Remote Desktop feature and have it enabled. The computer you are connecting from also needs to have a Remote Desktop client application installed. This client application is available on Windows computers by default, while on other operating systems, you may need to download and install a compatible Remote Desktop client.
Once the prerequisites are met, you can initiate a Remote Desktop Connection by launching the Remote Desktop client, entering the IP address or hostname of the remote computer, and providing your login credentials. Upon successful authentication, you will gain access to the remote computer’s desktop environment as if you were sitting in front of it, allowing you to interact with applications, files, and perform tasks remotely.
Remote Desktop Connection offers numerous benefits, including the ability to:
- Access your work computer or server from anywhere, eliminating the need for physical presence.
- Collaborate and provide remote support by taking control of another computer.
- Run resource-intensive applications on a remote server while using a less powerful local device.
- Maintain a centralized IT infrastructure by managing multiple computers or servers remotely.
It is important to note that security considerations are essential when using Remote Desktop Connection. Ensure that you have strong passwords, keep your remote computer’s operating system and applications updated, and use secure network connections (such as a virtual private network) to protect your data during remote sessions.
How to Enable Remote Desktop on your computer
1 – Click on the Start button in the taskbar to open the Start menu. From the Start menu, click on the Settings icon, which resembles a gear.
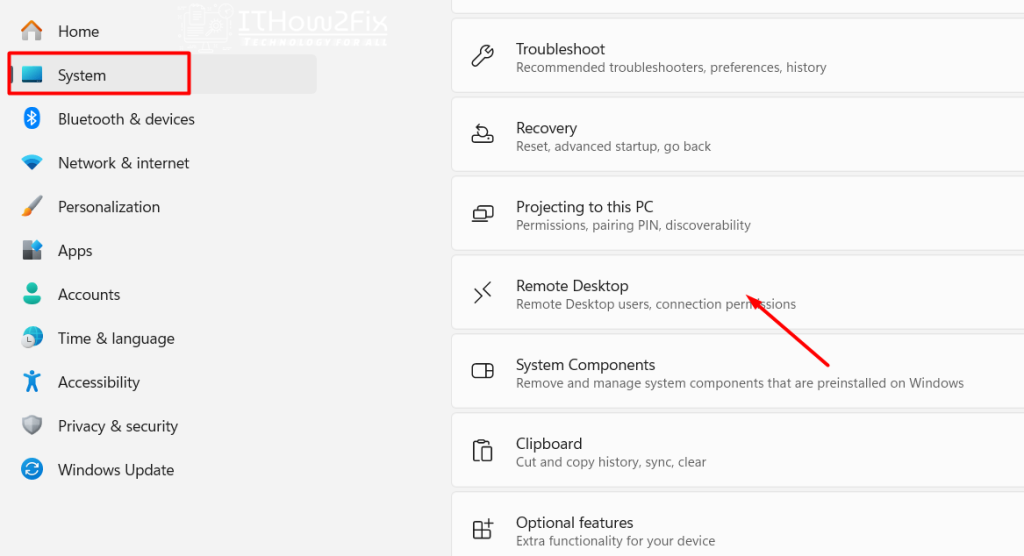
2 – In the Settings window, select the System category. Within the System settings, click on the Remote Desktop option located on the left-hand side.

3 – On the Remote Desktop settings page, toggle the switch to turn on Remote Desktop. You may be prompted to provide administrative credentials to make the change.
Once enabled, you can customize additional settings such as allowing connections from any version of Remote Desktop or only from PCs running Remote Desktop with Network Level Authentication (NLA).

4 – Optionally, if you want to allow Remote Desktop connections through the Windows Firewall, click on the Advanced settings link and ensure that the appropriate firewall rule is enabled. Make a note of your computer’s IP address or hostname, as you will need this information to connect to it remotely.
Remember, enabling Remote Desktop on Windows 11 may require administrative privileges on your computer. It’s important to consider security when using Remote Desktop. Ensure you have strong passwords, enable firewall protection, and consider using a virtual private network (VPN) for secure remote connections.


